
QEMU/KVM, short for Quick Emulator, is an open-source virtualization solution that combines the emulation capabilities of QEMU with the hardware acceleration of KVM (Kernel-based Virtual Machine). QEMU is a Type 2 hypervisor that emulates virtual machines via software, but when paired with KVM—a Type 1 hypervisor—it can achieve near-native performance. Deploying QEMU/KVM on Ubuntu 24 allows you to efficiently create and manage virtual machines, making it a powerful and stable platform for development, testing, and learning.
Installing QEMU/KVM
Enable the libvirtd virtualization service:
1
2
$ sudo systemctl enable libvirtd.service
$ sudo systemctl start libvirtd.service
Install QEMU/KVM and related packages, then reboot:
1
2
3
$ sudo apt update
$ sudo apt install qemu-kvm virt-manager bridge-utils
$ sudo reboot now
To allow your user account to operate virtual machines without root privileges, you need to add your user to the following permission groups:
libvirt: Allows interaction with the libvirt daemon to create, start, pause, and manage VMs.libvirt-qemuorlibvirt-kvm: Grants access to QEMU/KVM backend, including VM images and virtual networks.
1
2
3
4
$ groups
lin adm cdrom sudo dip plugdev users lpadmin libvirt
$ sudo useradd -g $USER libvirt
$ sudo useradd -g $USER libvirt-kvm
Creating a Virtual Machine
Download the ISO image for the Linux distribution you want to install. In this example, we use Ubuntu 24 Server.
Launch the Virtual Machine Manager by running virt-manager in the terminal or finding it in your system’s application menu.
Click File -> New Virtual Machine in the top-left corner.
In the new window, choose Local install media (ISO image or CDROM), then click Forward.
Select the ISO image you downloaded earlier and click Forward.
Set the virtual machine name, memory size, number of CPU cores, and other settings.
After completing the configuration, the virtual machine will automatically boot and enter the Linux installation process.
Configuring NAT DHCP to Assign IP Addresses to Virtual Machines
By default, QEMU/KVM uses NAT mode for networking, and will automatically assign a random IP address (e.g., 192.168.XXX.XXX) to each virtual machine. If you want to assign a static IP address to a VM, you can do so by editing the /etc/libvirt/qemu/networks/default.xml file.
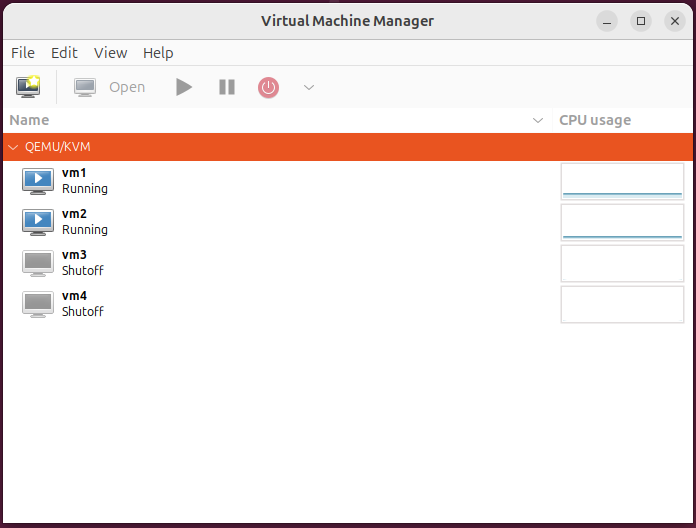
First, check the MAC addresses of each virtual machine. For example, assume there are four virtual machines:
1
2
3
4
5
6
7
8
$ virsh dumpxml vm1 | grep 'mac address'
     <mac address='52:54:00:e4:de:fb'/>
$ virsh dumpxml vm2 | grep 'mac address'
     <mac address='52:54:00:14:67:fa'/>
$ virsh dumpxml vm3 | grep 'mac address'
     <mac address='52:54:00:39:aa:1d'/>
$ virsh dumpxml vm4 | grep 'mac address'
     <mac address='52:54:00:95:aa:41'/>
Check the current NAT network (usually named default):
1
2
3
4
$ virsh  net-list
 Name      State    Autostart   Persistent
--------------------------------------------
 default   active   yes         yes
Edit the default.xml configuration file:
1
$ virsh  net-edit default
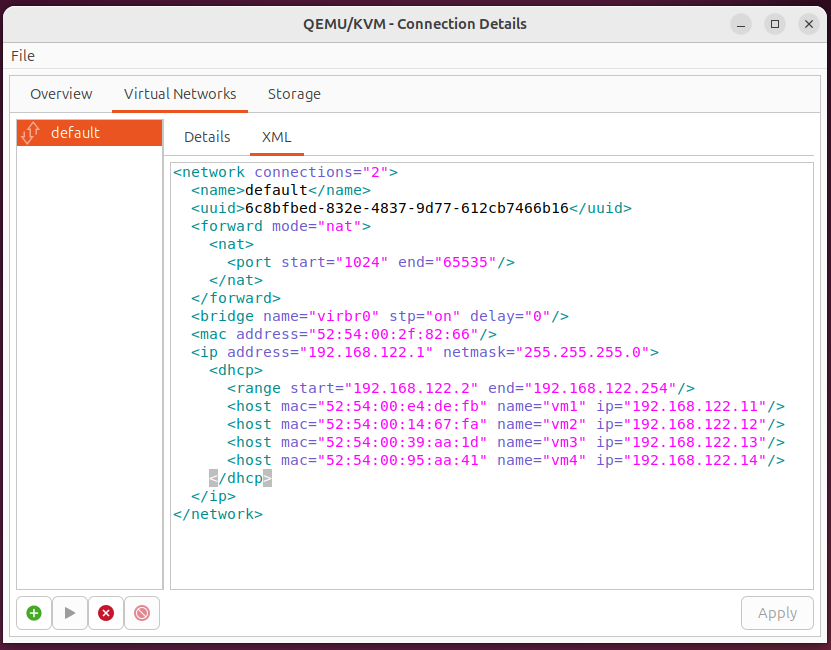
Or in the GUI: go to Edit -> Preferences -> Enable XML editing, then use Edit -> Connection Details -> Virtual Networks -> XML to modify the configuration.
The original <dhcp> block should look like this:
1
2
3
<dhcp>
  <range start="192.168.122.100" end="192.168.122.254"/>
</dhcp>
Add
1
2
3
4
5
6
7
<dhcp>
    <range start="192.168.122.2" end="192.168.122.254"/>
    <host mac="52:54:00:e4:de:fb" name="vm1" ip="192.168.122.11"/>
    <host mac="52:54:00:14:67:fa" name="vm2" ip="192.168.122.12"/>
    <host mac="52:54:00:39:aa:1d" name="vm3" ip="192.168.122.13"/>
    <host mac="52:54:00:95:aa:41" name="vm4" ip="192.168.122.14"/>
</dhcp>
After saving and closing the file, restart the NAT network:
1
2
$ virsh  net-destroy default
$ virsh  net-start default
Then reboot your virtual machines. If the OpenSSH server is installed, you can connect from your host machine via SSH like so:
1
$ ssh user@192.168.122.11
Comments powered by Disqus.