
This post documents my steps of manually downloading, configuring, and compiling Linux kernel (v6.12) on an Ubuntu 24.04 machine.
Installing Required Tools
To compile the Linux kernel, several development tools and libraries are needed. You can install them with the apt package manager:
1
2
sudo apt update
sudo apt install -y git build-essential flex bison bc libncurses-dev libssl-dev libelf-dev
Brief explanation of each package:
build-essential: Includesgcc,make, and other essential build toolsflex,bison: Needed for building the configuration menubc: A math utility used in kernel Makefileslibncurses-dev: Provides TUI interface formake menuconfiglibssl-dev,libelf-dev: Required by some optional modules
Downloading the Linux Kernel Source Code
I chose the latest mainline version, v6.12. Use the following command to clone it:
1
2
git clone --depth=1 --branch=v6.12 git://git.kernel.org/pub/scm/linux/kernel/git/torvalds/linux.git
cd linux
The --depth=1 option fetches only the latest commit, which makes the download faster.
Generating a Minimal Configuration with tinyconfig
To quickly produce a minimal working kernel, I used tinyconfig:
1
make tinyconfig
This generates a .config file that enables only the most essential kernel features.
Compiling the Linux Kernel
Now compile the kernel:
1
make -j$(nproc)
$(nproc) uses all available CPU cores for faster build.
After compilation, the output image will be located at:
./arch/x86/boot/bzImage
bzImage is a bootable Linux kernel image, short for “big zImage”. It is a self-extracting compressed format mainly used for x86/x86_64 architectures.
You can check its file type with:
1
file arch/x86/boot/bzImage
Booting the Kernel with QEMU
First, install QEMU:
1
sudo apt install qemu-system-x86
Then boot the kernel:
1
qemu-system-x86_64 -kernel arch/x86/boot/bzImage
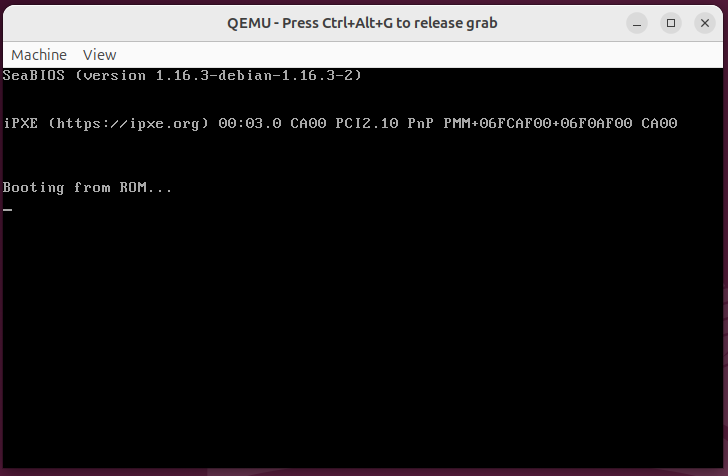
Unfortunately, the screen only showed:
1
Booting from ROM...
And nothing else followed—no kernel messages appeared. This usually means the kernel lacks the drivers necessary to output to the display.
Tip: After clicking into the QEMU window, your mouse will be captured. Press
Ctrl + Alt + Gto release it.
Configuring menuconfig
After closing the QEMU window, run menuconfig to modify kernel settings (make sure libncurses-dev is installed):
1
make menuconfig
Enable TTY Support
Navigate to:
Device Drivers  --->
  Character devices  --->
    <*> Enable TTY
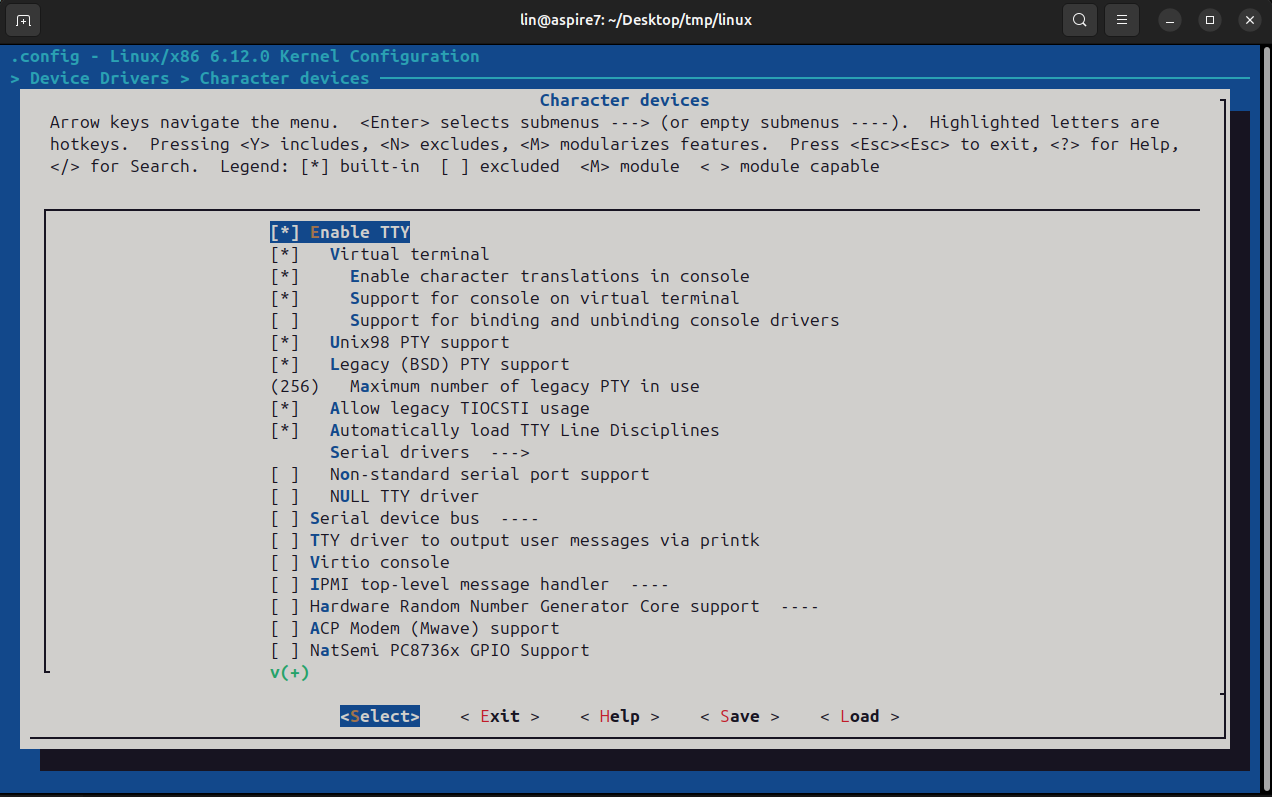
Use arrow keys to navigate and press
Yor the spacebar to enable the option.
This setting enables support for TTY devices (i.e., text console and serial output).
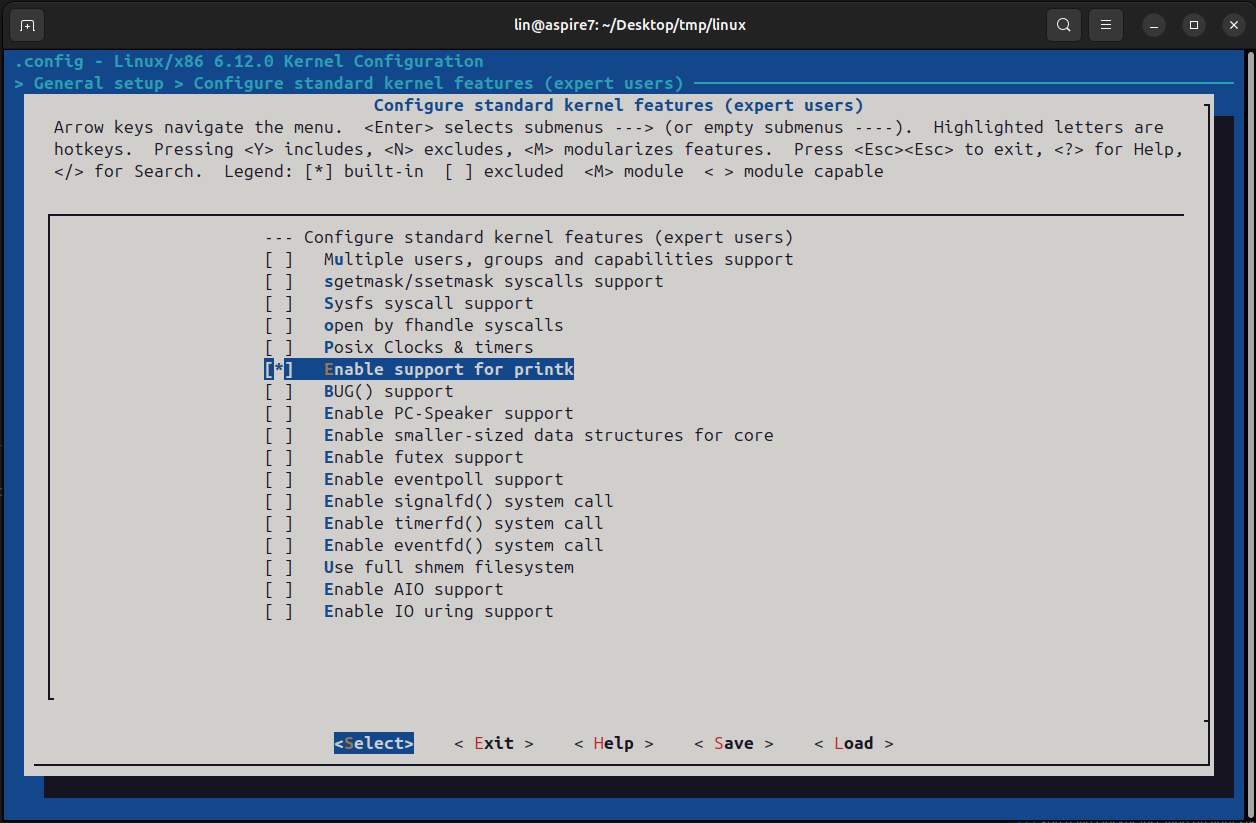
Enable printk Support
Also enable the kernel logging mechanism:
General setup  --->
  Configure standard kernel features (expert users)  --->
    [*] Enable support for printk
Save your configuration and recompile:
1
2
make -j$(nproc)
qemu-system-x86_64 -kernel arch/x86/boot/bzImage
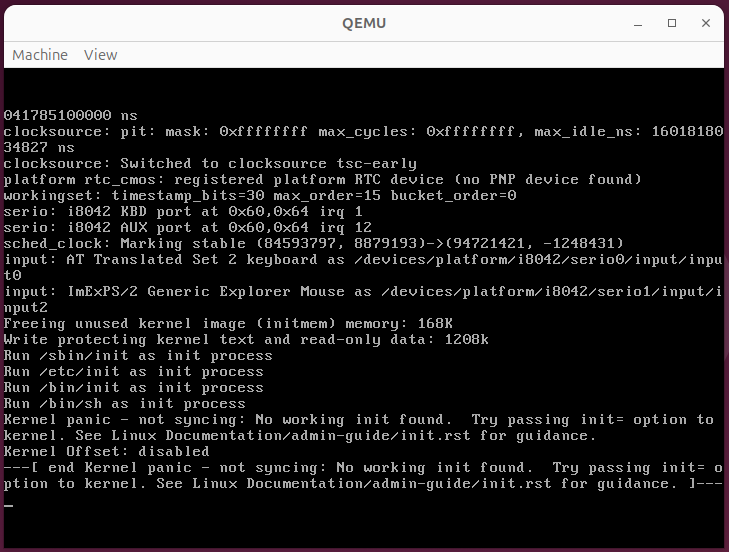
Now the terminal finally shows kernel boot messages. Although it ends with:
1
panic - not syncing: No working init found
we have successfully booted the kernel and verified output is working.
To fix this panic, you need to provide a valid init process (e.g., systemd or busybox). This will not be covered in this post.
If you want to reset your kernel configuration to a clean tinyconfig state for further experiments, use:
1
make mrproper
Comments powered by Disqus.